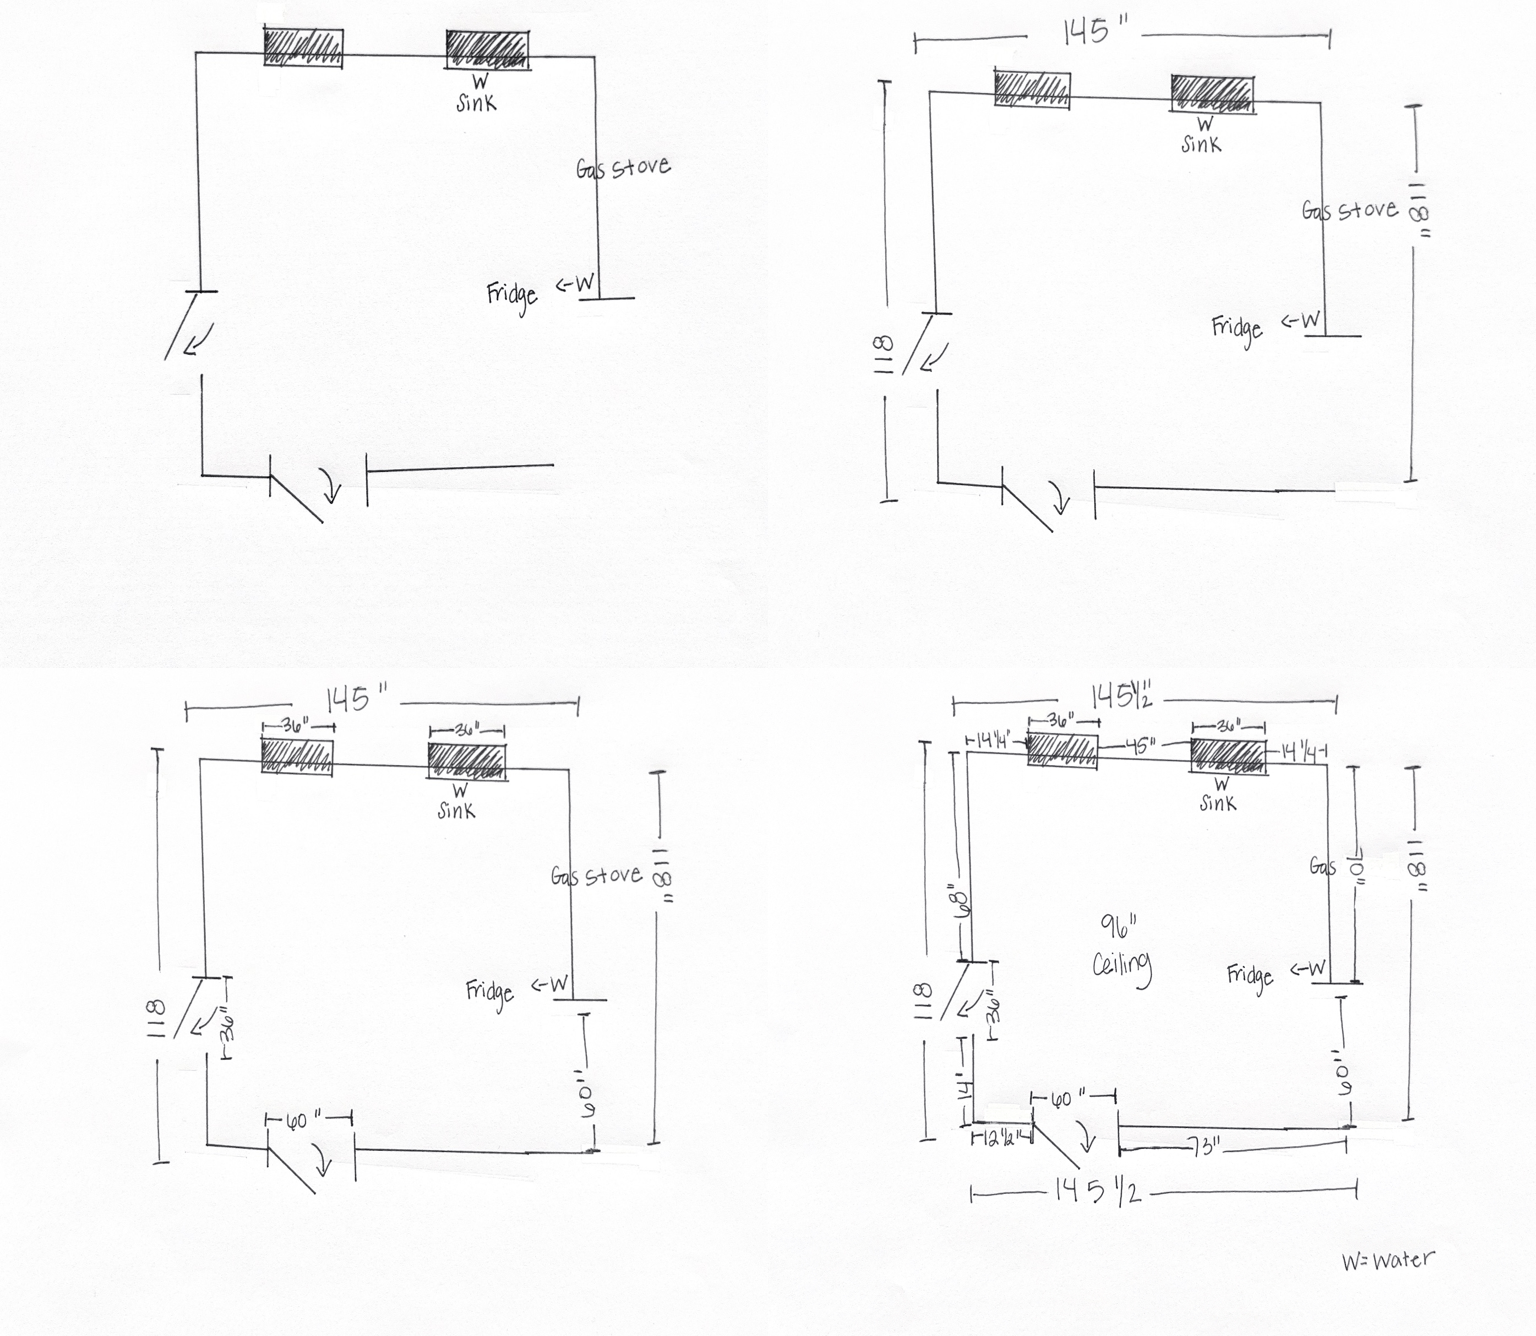
To make the process simple, we’ve put together this step-by-step guide to help you measure your space. With just a few basic tools and a rough sketch, our team can design a custom layout and provide you with an accurate quote.
What You’ll Need:
-
Pen or pencil
-
Paper
-
Measuring tape
-
Camera

Step-by-Step Instructions:
- Draw Your Kitchen Layout: Sketch the shape of your kitchen and mark where the walls are.
- Mark Doors and Windows: Add all doorways and windows to your drawing. Label them clearly.
- Add Cabinet Layout: Mark your current cabinet setup, or the layout you’re hoping for if you’re planning a change.
- Mark Location:Indicate where your appliances will go;think stove, fridge, dishwasher—as well as the location of electrical outlets, plumbing connections, light fixtures, and vents.
- Start Measuring
Use your tape measure and record the following:- Width of windows and doors (from outer trim to outer trim)
- Measure how far apart the windows are, and also the distance from the edge of the wall to each window.
- Wall lengths (corner to corner)
- Floor-to-ceiling height
- Countertop depth (from wall to front edge)
- Indicate depth & height of soffit if present
- Flooring: Write down flooring type, any flooring transition and any flooring that will be replaced.
- Label Cabinet Areas: Note whether each section has upper cabinets, lower cabinets, or both.
- Take Photos: Snap a few clear photos of your kitchen from different angles. This helps our designers understand how everything fits together.
Once you have your sketch, measurements, and photos, send them our way! We’ll take care of the rest and get started on your custom cabinet design.

Step-by-Step Instructions:
- Open entry and shower doors before measuring to avoid clearance issues. Allow at least 18″ from the toilet’s center to the cabinet edge.
- Note the location of outlets, switches, mirrors, and plumbing.
- Measure the full width of your current cabinet, including the countertop.
- Measure the cabinet height from the base to the top. Standard vanity heights range from 30″ to 36″.
- Measure cabinet depth—common depths fall between 17″ and 24″.
Things to Keep in Mind:
-
Plumbing placement matters. The location of pipes and drains will affect the size, style, and placement of your vanity.
-
Double vanities need more plumbing clearance than single ones, so plan accordingly.
-
Bathroom door swing is important—make sure there’s enough space between the vanity and the door so it opens fully.
-
Leave room to move. Make sure there’s enough clearance in front of the vanity to open cabinet doors and drawers, and to move around comfortably.
-
Add a 4-inch buffer on each side of the vanity for countertop overhangs and other nearby fixtures.
-
Measure vanity depth from the wall to the front edge of any baseboard trim. This ensures the vanity fits snugly against the wall without gaps.
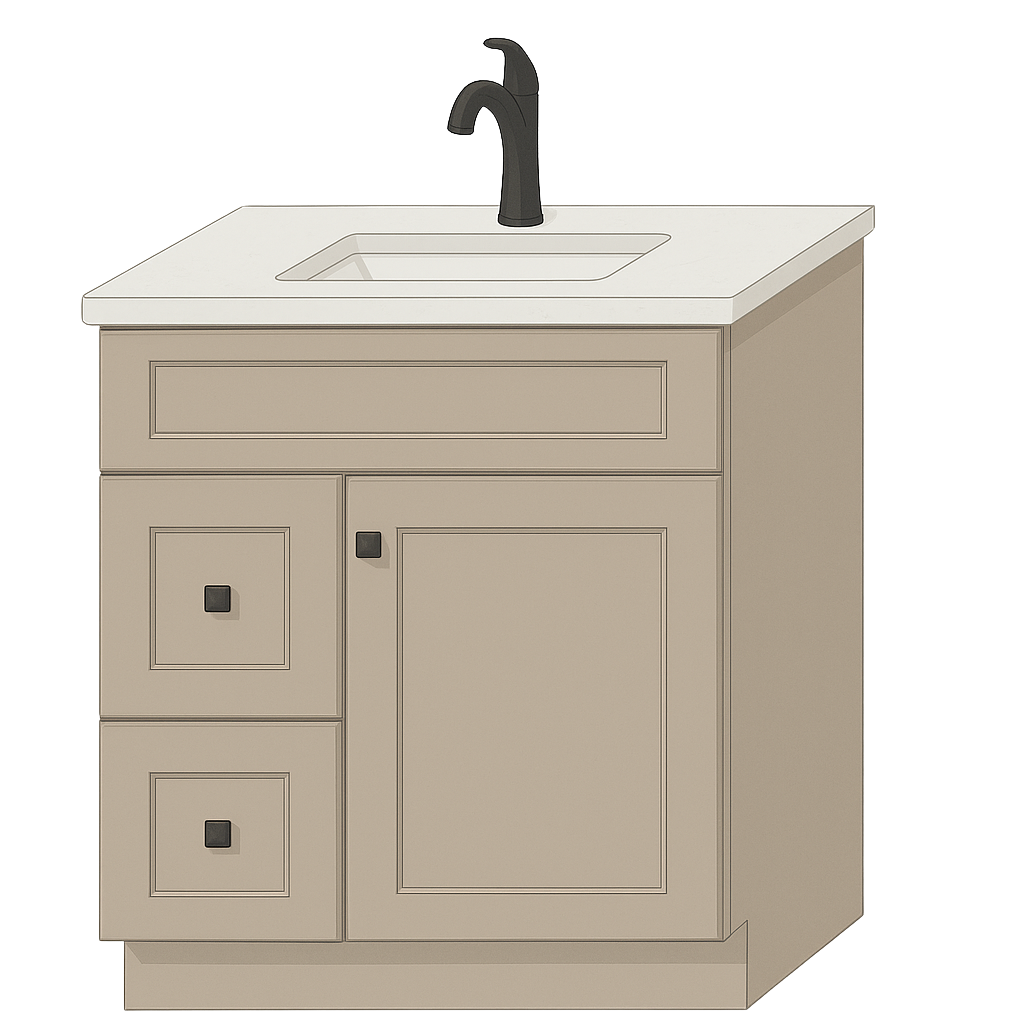
Single Sink Vanities
Single sink vanities are ideal for smaller bathrooms or guest baths. They typically range from 24″ to 48″ wide.
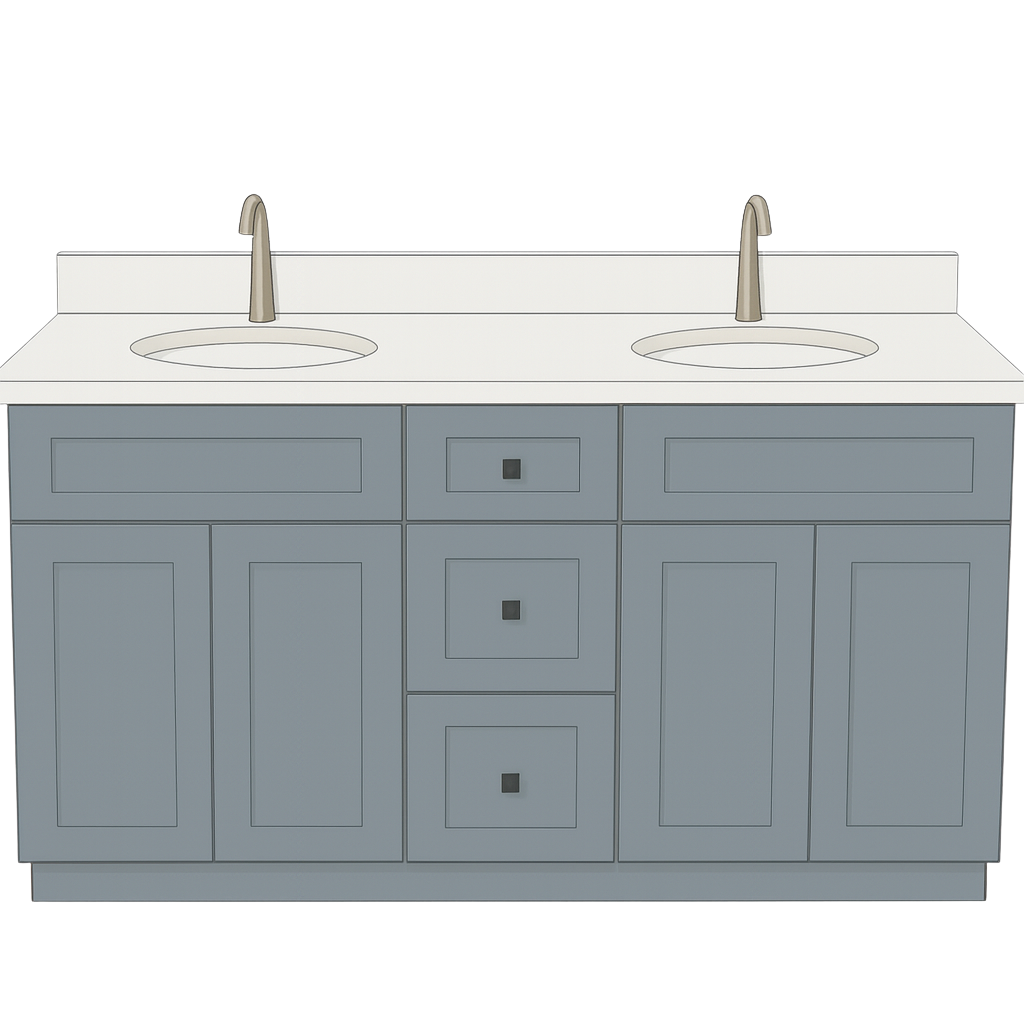
Double sink vanities
Double sink vanities are perfect for shared or spacious bathrooms, offering more storage and counter space.
Things to Keep in Mind:
-
Plumbing placement matters. The location of pipes and drains will affect the size, style, and placement of your vanity.
-
Double vanities need more plumbing clearance than single ones, so plan accordingly.
-
Bathroom door swing is important—make sure there’s enough space between the vanity and the door so it opens fully.
-
Leave room to move. Make sure there’s enough clearance in front of the vanity to open cabinet doors and drawers, and to move around comfortably.
-
Add a 4-inch buffer on each side of the vanity for countertop overhangs and other nearby fixtures.
-
Measure vanity depth from the wall to the front edge of any baseboard trim. This ensures the vanity fits snugly against the wall without gaps.

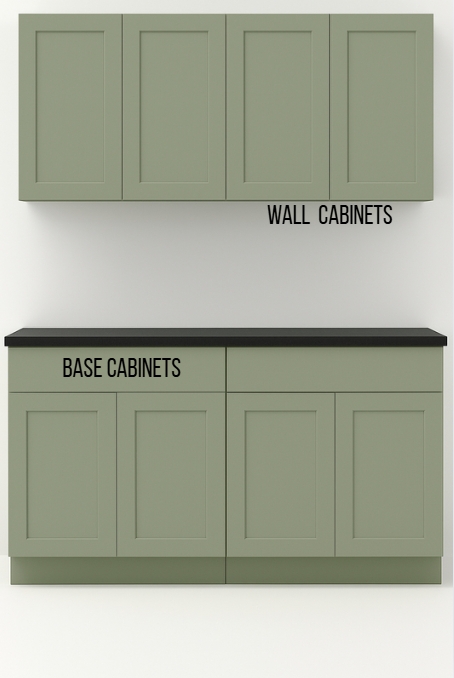
Wall Cabinets
- Typically installed 18″ above the countertop
- Depth:12″ standard (deeper for fridge or microwave)
- Heights:12″, 15″, 18″, 24″, 30″, 36″, 42″
- Widths:9″–36″ (in 3″ increments)
Base Cabinets
- Height: 34.5″ ( Doesn’t include the countertop)
- Depth: 24″
- 9″–15″: Pull-out spice racks, utensil canisters, or tray storage
- 18″: Small drawers or full-height doors—can be used for trash pull-outs
- 24″, 27″, 30″, 36″: Double doors with top drawer or all-drawer units
- 42″–48″: Usually for blind corner cabinets.
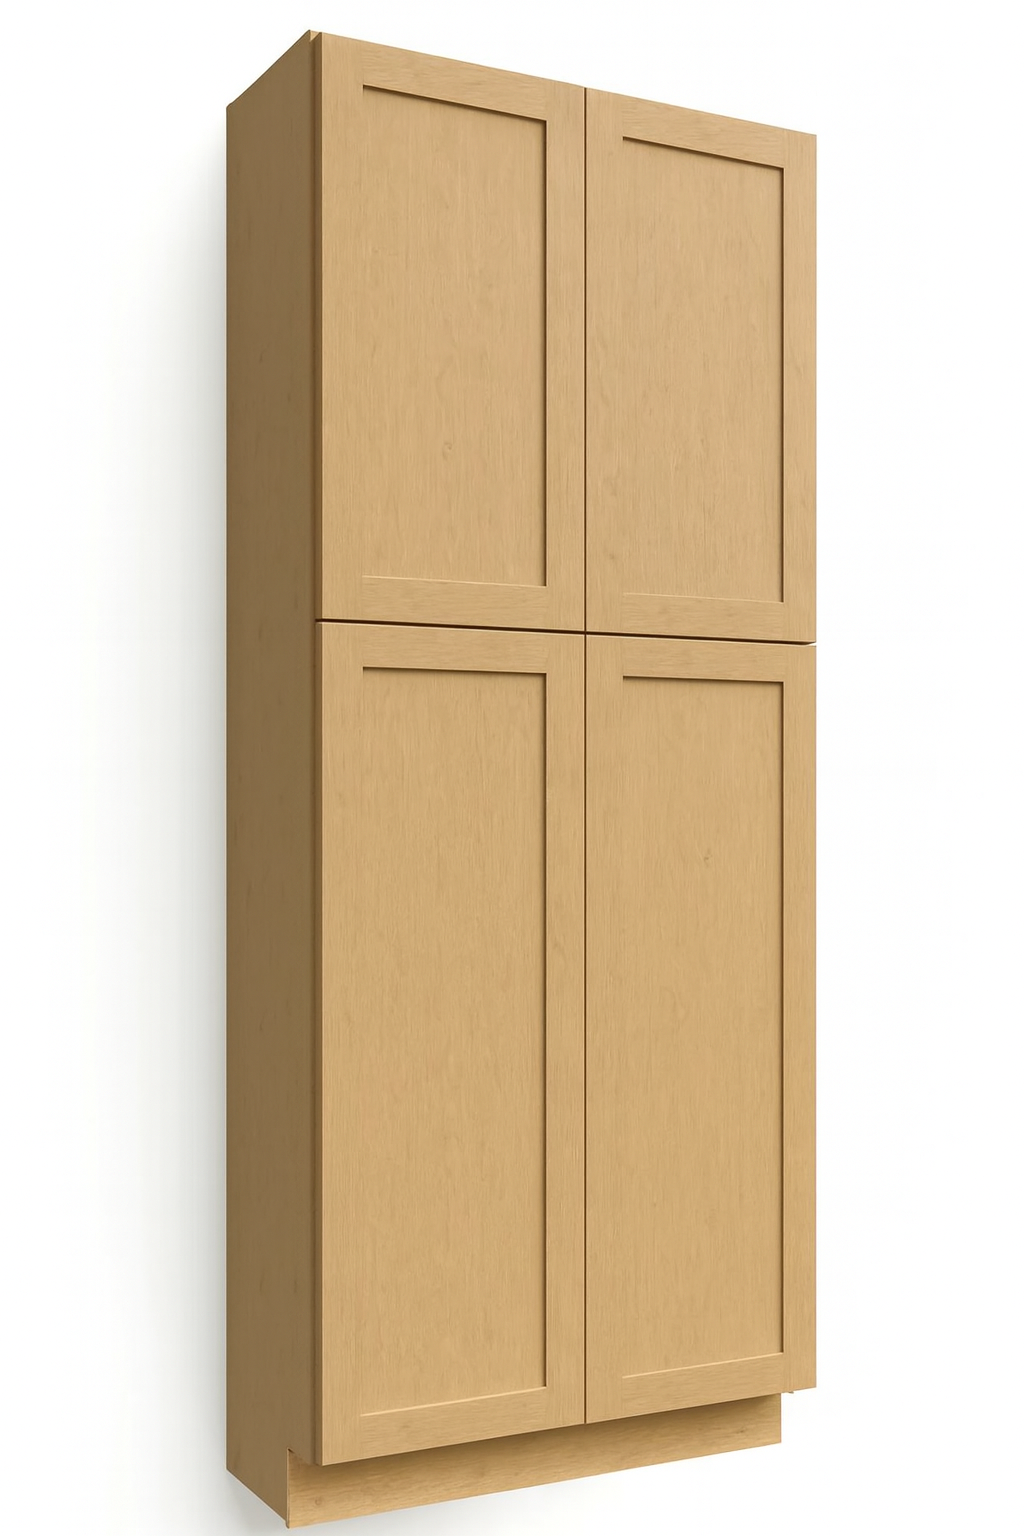
Tall Cabinets
Tall cabinets, pantry cabinets, or utility cabinets—can transform any space by extending from floor to ceiling, maximizing vertical storage and creating a streamlined, built-in aesthetic.
Whether it’s in a kitchen, bathroom, bar, or laundry room, these cabinets provide ample room for storing essentials, from cookware and linens to cleaning supplies and barware. The look can be achieved by stacking smaller cabinet units, incorporating custom cabinetry, or adding integrated panels around appliances for a cohesive, stylish finish.
Typically ranging from 84 to 96 inches in height, full-height cabinets may reach all the way to the ceiling, rise from the floor to the top of upper cabinets, or span from the countertop upward. Their sleek vertical lines bring a sense of height and sophistication to any room, while also offering impactful functionality.
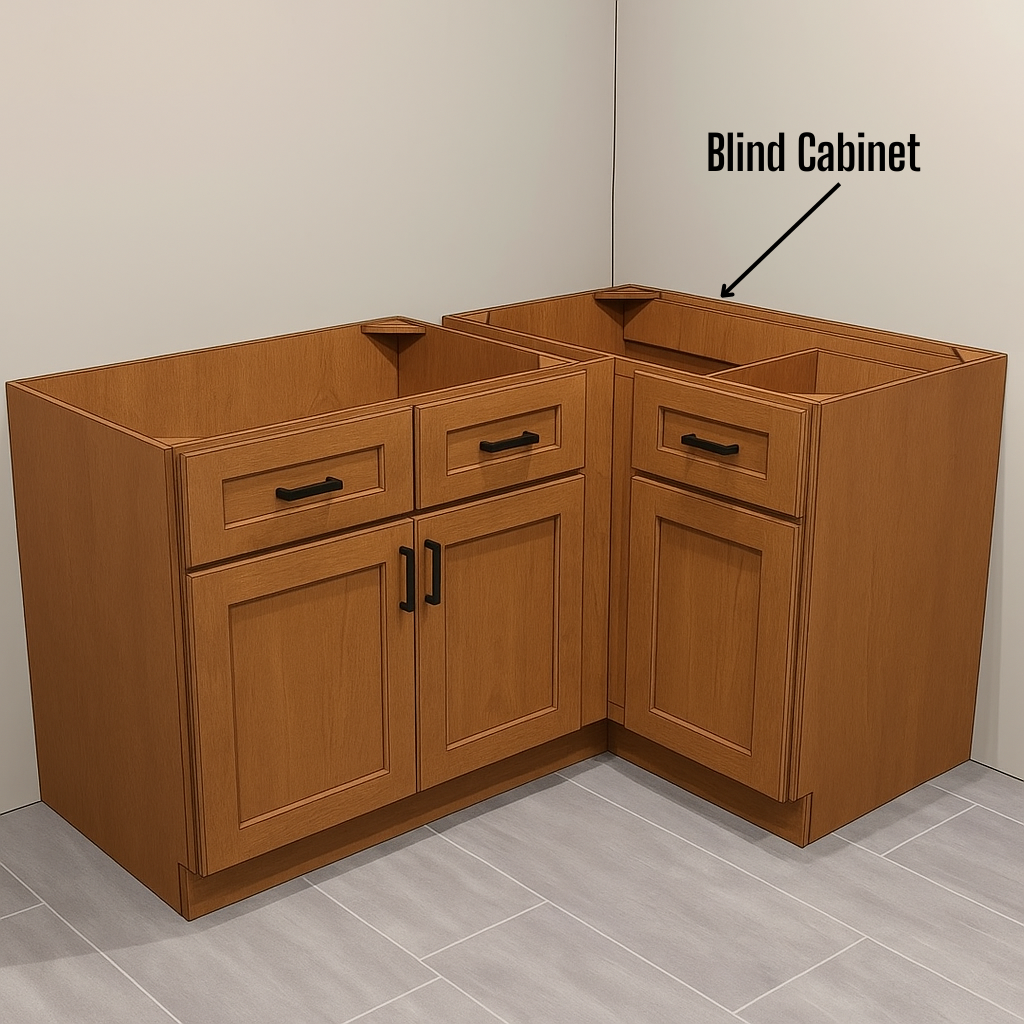
Blind Corner
A blind corner base cabinet is installed where two cabinet runs meet at a corner, with part of the cabinet tucked behind the one next to it. This hidden section helps maximize corner storage without wasting space. To be functional, it must be paired with a filler and an adjacent cabinet.
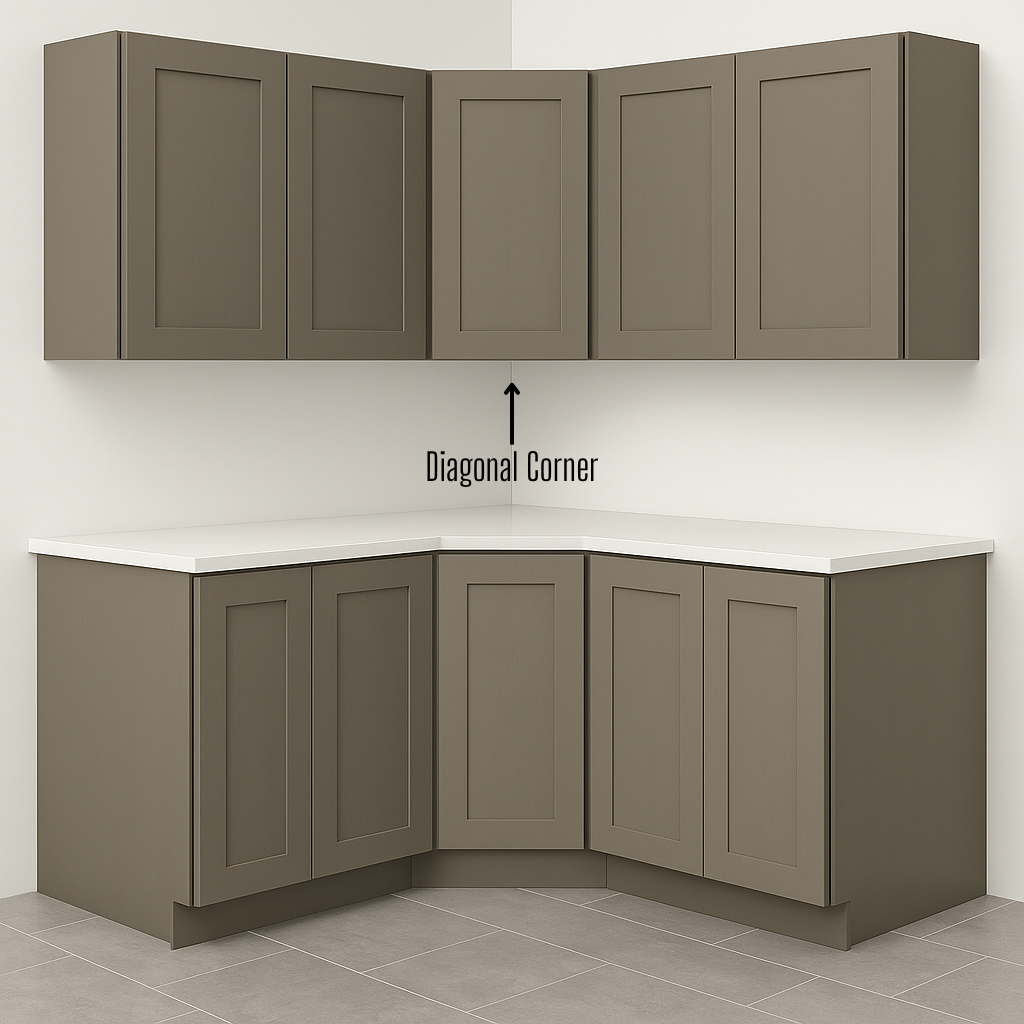
Wall Diagonal Corner Cabinets
Wall diagonal corner cabinets are crafted to optimize space where two kitchen walls converge. With an angled front, they transform awkward corners into practical storage solutions, making the most of areas that are usually tough to access.
Filler
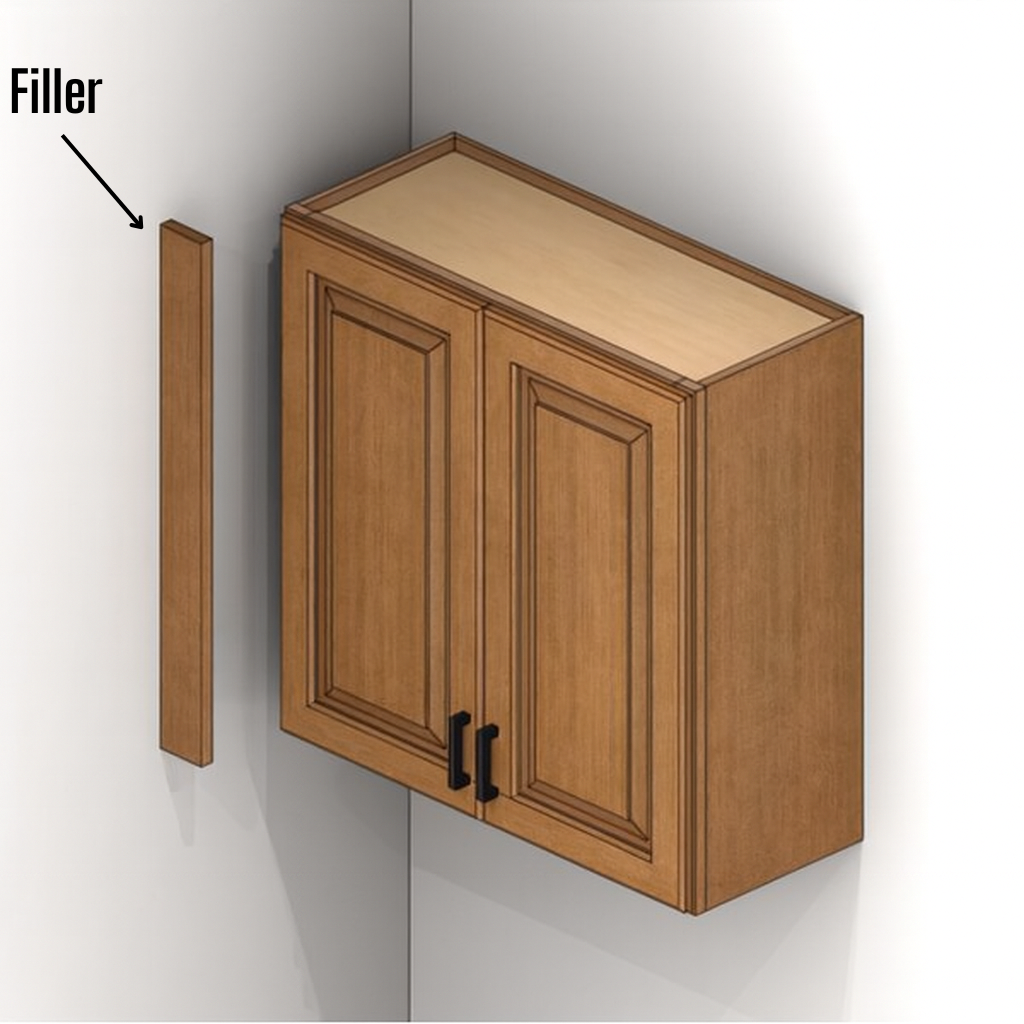
A filler is a finished wood piece that fills gaps between cabinets or between a cabinet and nearby surfaces, so doors and drawers can open properly. If your kitchen has tight spots or uneven walls, fillers can help make everything fit smoothly.
Fillers come in standard widths of 3″ and 6″, are available in various lengths to fit different spaces, and are designed to be cut on-site for a precise fit.
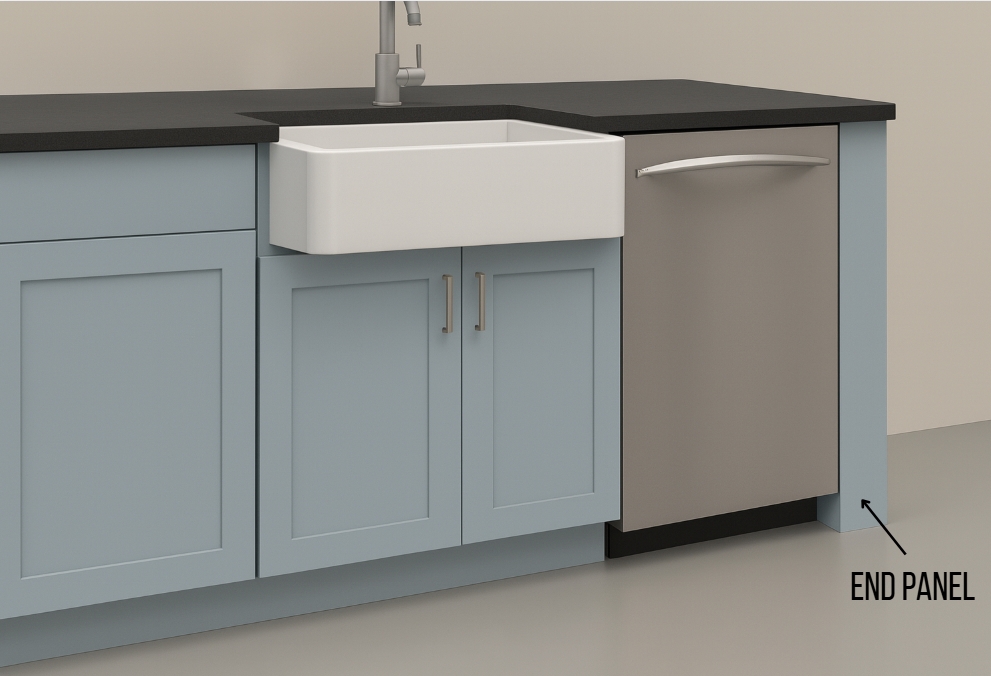
Dishwasher End Panel
A trim piece added to the exposed side of a dishwasher at the end of cabinet runs. It offers a clean look and can help shield nearby surfaces.
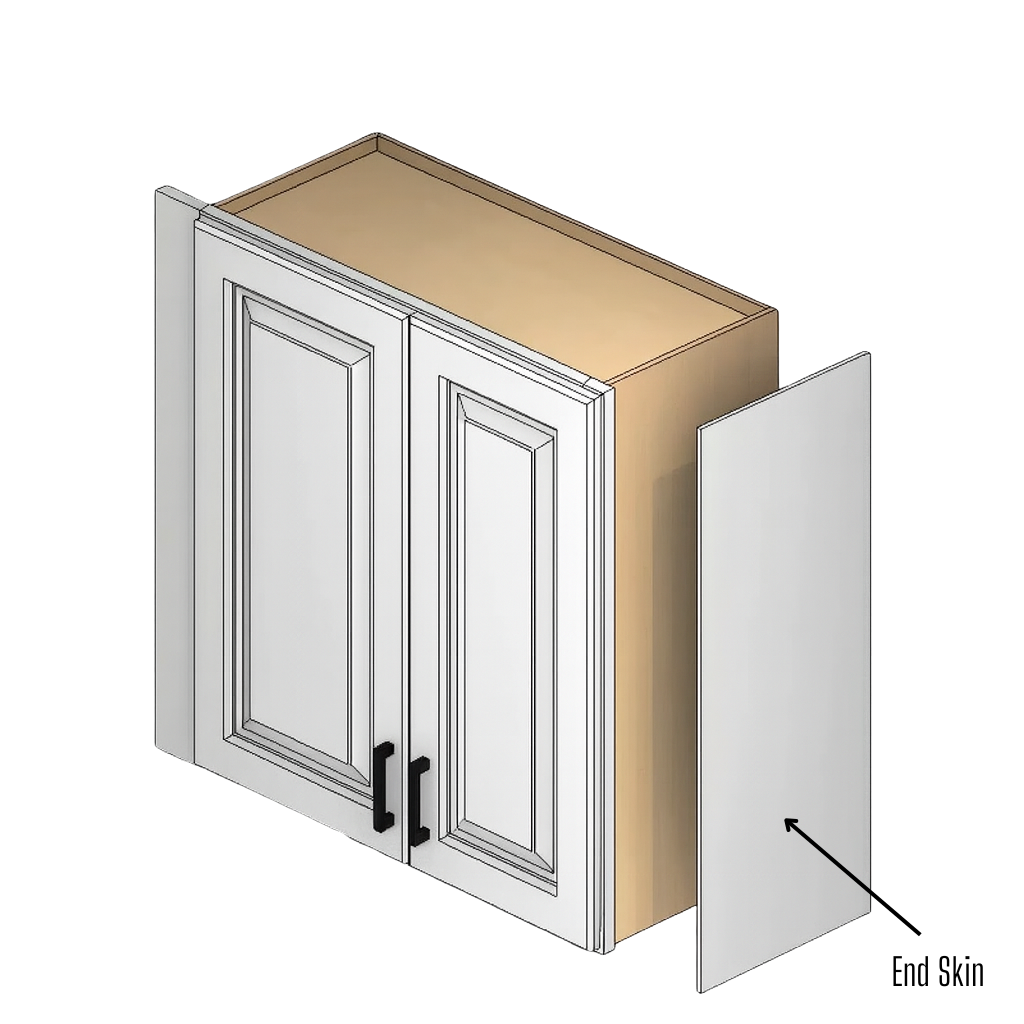
End Skin
Cabinet skins provide a finished look by covering the raw sides, tops, and bottoms of cabinet.
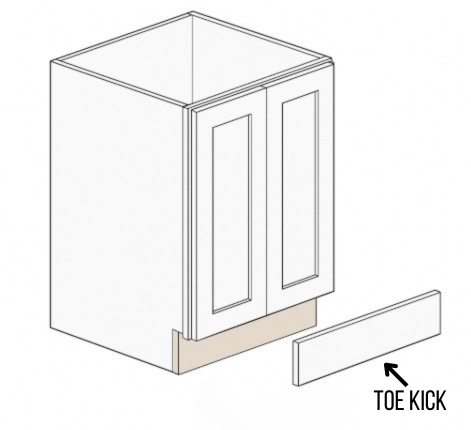
Toe Kick
The toe kick is typically 3 inches high and 4 inches deep, ideal for comfort and clean design at the counter.


U-Shaped Kitchen Layout
Efficient and spacious, the U-shaped layout uses three connected walls for maximum counter space and easy workflow. The fourth side can be open or enclosed, depending on your style.
L-Shaped Kitchen Layout
This layout uses two connected walls to form an L, making it a flexible option for both small and large kitchens. It creates an open feel with smooth traffic flow, and there’s room to add an island or cart for extra function.
Modified U- or L-Shaped Layout
A variation of the classic U or L, this layout includes a break in cabinetry for doors, windows, or walkways. It’s great for open flow, added light, and space for features like bar seating or a small island.


Open-Concept Kitchen Layout
This layout removes walls to create a seamless flow between the kitchen, dining, and living areas. It’s ideal for entertaining, brings in more natural light, and can make small spaces feel larger. Combines versatile design with open visibility.
Peninsula Kitchen Layout
Similar to an L-shaped layout, this design features a connected peninsula that adds extra counter space, storage, and seating. It offers many of the same benefits as a U-shaped kitchen, but works well in smaller spaces.
One-Wall Kitchen Layout
Also called a single-wall kitchen, this layout places all appliances and cabinets along one wall. It’s a great space-saver—ideal for small homes, studios, or open-concept designs.


Island Kitchen Layout
An island layout features a freestanding workspace in the center of the kitchen, adding prep space, storage, and often seating. It’s a favorite for entertaining and creates a central hub for cooking and gathering. Islands work best in larger kitchens and pair well with L-shaped, U-shaped, one-wall, or wide galley layouts.
Galley Kitchen Layout
A galley kitchen uses two facing walls with cabinets and appliances, creating a central walkway. This layout is perfect for tight spaces and smaller homes, offering maximum function in a compact footprint.
G-Shaped Kitchen Layout
An expansion of the U-shaped layout, the G-shaped design adds a partial fourth wall or peninsula for even more counter space and storage.
